
# Groups & Permissions
You can share access to your projects with other people by inviting them to be users in your projects. To control the level of access these users have, you can add them to different groups and set their permissions.
# Managing Groups
All users that are invited to a project must be added to a group and a user can only be in one group within a project.
With groups you can provide different levels of access to your system to different users.
# What are Project Admins?
Every project starts with a Project Admins group, which is the group with the power to edit your projects.
This group contains the user who created the project. The Project Admins group cannot be configured, renamed or removed.
# Default Groups
By default, every project will have the following three groups available in addition to the Project Admins Group:
| Group | Description |
|---|---|
| Read | Users in this group will be able to view all records in all tables in the project |
| Read / Write | Users in this group will be able to edit all records in all tables in the project |
| Read / Write / Delete | Users in this group will be able to edit and delete all records in all tables in the project |
As new tables are added to your project, these groups will be updated with permissions to the new tables.
These groups cannot be configured, renamed or removed. To setup custom permissions for your users, create a new group.
# Creating a Group
To create a new group, open up project edit mode and select the users tab.

Select Groups in the left hand menu.

Click the Add Group button in the top right.

Enter a name for the group name and click the next arrow.

The group will be created. You can now configure the group permissions and add users to the group.
# Renaming a Group
To change the name of a group, open the settings menu for the group.

Select Edit Group Name.

Amend the name and click the next arrow.
# Deleting a Group
To remove a group, open the settings menu for the group.
Select Remove Group.

Click Delete.

This will remove the group and remove access from the project for any users that were still within that group. To change the group of a user, see changing a user's group.
# Configuring Group Permissions
To configure the permissions for a group, open up project edit mode and select the users tab.
Select Groups in the left hand menu.
Select the menu for the group.
Select Configure Permissions. This will take you to a page where you can specify user permissions for each table.
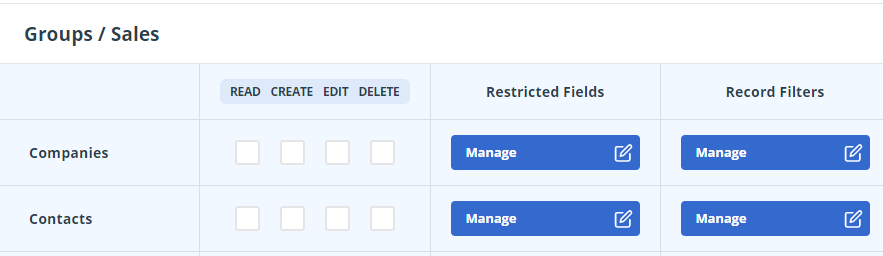
Each flag provides users with different levels of access for each table.
| Flag | Description |
|---|---|
| Read | Ability to view records. |
| Create | Ability to create new records. |
| Edit | Ability to save changes to records. |
| Delete | Ability to delete records. |
# Field Permissions
As well as choosing the permissions a group has for the whole table, you can also specify that this group cannot view or cannot edit specific fields in the table. For example, you may have some pricing information that you do not want to share with everyone in your organisation.
To configure permissions for a field on a table, click Manage under the Restricted Fields heading. Select the field that you would like to restrict access for.
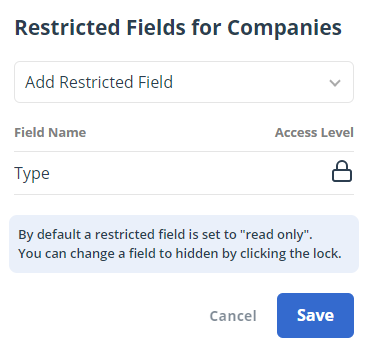
If you would like the field to be read only for the group then leave the settings as they are. The padlock indicates that the field is read only.

If instead you would like to restrict this field so that users in the group cannot see it, click the lock. The icon changes.

If you would like to remove the restriction, hover over the field name and click the bin icon.
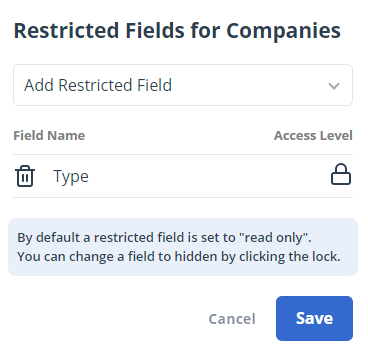
Click Save to confirm the changes.
# Record Permissions
You can restrict which records in a table a user can see. For example, you may want users to only be able to see Companies for which they are the Point of Contact.
To configure record permissions for a table, click Manage under the Record Filters heading. You can choose to filter on any field of type user or the created by user. Select the field that you would like to use as the condition.
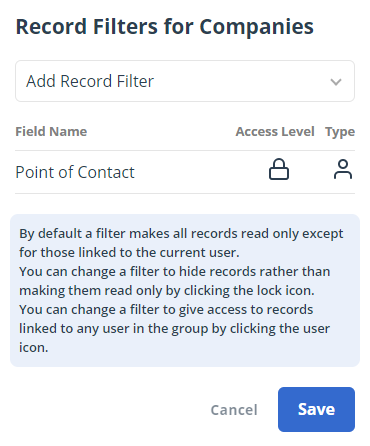
To add the restriction that users can only edit records where the selected field matches their user, leave the settings as they are with the padlock and single user type.
If you would like it such that users can only see records where the selected field matches their user, click the padlock to change this setting.
Additionally, you can select whether the field must be the user that is logged in or any user in the group that the logged in user is in by clicking the Type icon.
Click Save to confirm the changes.