
# Tables
Tables are similar to spreadsheet worksheets. You configure fields and create records, where fields can be thought of as columns, and records as rows.
To create tables for your projects that are ready to store your records you will need to:
TIP
Most tasks in Gridfox can be carried out from the table builder or screen builder and both methods will be described. For more details on the differences see Screen Builder vs. Table Builder
# Creating Tables
If you are a Project Admin for a project then you will be able to create new tables. This is done in Edit Mode for a project, which is accessed by clicking the Edit Project button in the top right corner.

# Creating Tables using Screen Builder
Open up edit mode for the project and select the Screens tab.

Click the Add New button in the left hand navigation bar.

Select Table from the menu. For more information about the other screen types see Screens.

Click Add.

Enter a name for the table in the Table Name section.

Gridfox will recognise whether you have entered a singular or plural name. The singular name will be shown on the newly created table.
TIP
The table name will be the name that shows up in the left hand navigation bar for users to select to view records for this table.
To view or edit the singular or plural name for the table, scroll to the bottom of the left hand navigation bar to the table settings. Click to amend the names.

You can save your progress at any time by clicking the Save button in the top right hand section of the canvas. Note that if you haven’t added a reference field to your table, saving the new table will prompt you to do so. See the Reference fields section for more information.
Your new table has been created and fields can now be added. See fields for more information.
# Creating Tables using Table Builder
Open up edit mode for the project and select the Tables tab.

Click the Add Table button.

Enter a name for the table.

Click the next arrow and the table will be created.

Gridfox will recognise whether you have entered a singular or plural name. The plural name will be shown on the newly created table.
TIP
The table name will be the name that shows up in the left hand navigation bar for users to select to view records for this table.
To view or edit the singular or plural name, click the cog icon for the table.

The table names can then be edited.

You can save your progress at any time by clicking the Save button in the top right hand section of the canvas. Note that if you haven’t added a reference field to your table, saving the new table will prompt you to do so. See the Reference fields section for more information.
Your new table has been created and fields can now be added. See fields for more information.
# Table Builder Spreadsheet Upload
When you are using the table builder, rather than creating each table individually you can start your project by uploading spreadsheets. This allows you to define the structure of your projects and also import information.
Create a spreadsheet with the data and structure that you would like to upload. Click Upload Spreadsheet.

Select your spreadsheet. The draft data model will display for you to amend and confirm.
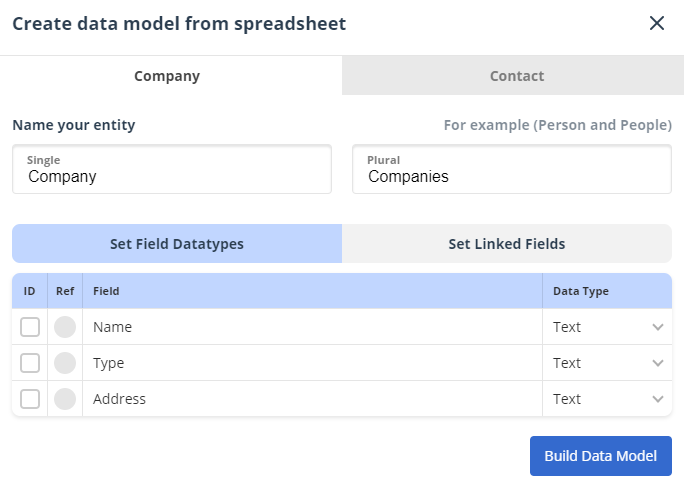
Once you are happy with the model, click Build Data Model. This will create the tables and fields.
To help speed up this process, you can customise how the tables will be created by adding tags in your spreadsheet. For each column you can append values:
- #Ref sets the field as a reference field
- #ID sets the field as a unique field
- Specify the field type by appending the name of the field type e.g. #Date
TIP
If you specify a field as being a List, Gridfox will take all the unique values in that column and populate the List options for you.
Icon and image fields are not supported on the spreadsheet upload. Add these to your tables using the Table Builder or the Screen Builder.
You can also add links to other tables by referencing parent tables before the field e.g. Company.CompanyName.
For more information on parent and child tables see Linking Tables.
# Deleting Tables
Deleting a table will delete all records for that table. This action cannot be undone.
# Deleting Tables using Screen Builder
Open up edit mode for the project and select the Screens tab.
Select the table that you could like to delete from the left hand navigation bar.
Click Delete in the top right hand corner of the canvas.

Click Delete again.

This will delete all records for this table and the table itself.
# Deleting Tables using Table Builder
Open up edit mode for the project and select the Tables tab.
Click the Delete icon in the name bar for the table you would like to delete.

Click Delete again.
This will delete all records for this table and the table itself.
# Linking Tables
Gridfox becomes really powerful when you start to add multiple tables and link them together.
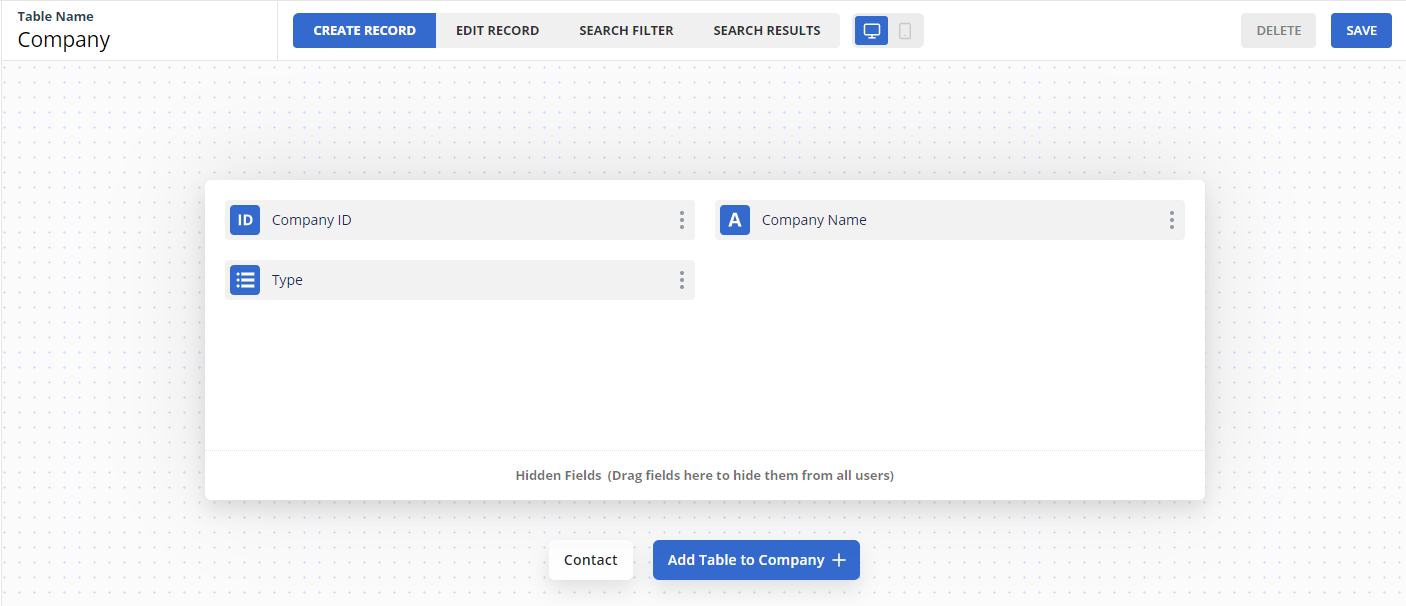
For example, create a new Contacts table and link it from your Companies table to allow you to record multiple contact records against each company record.
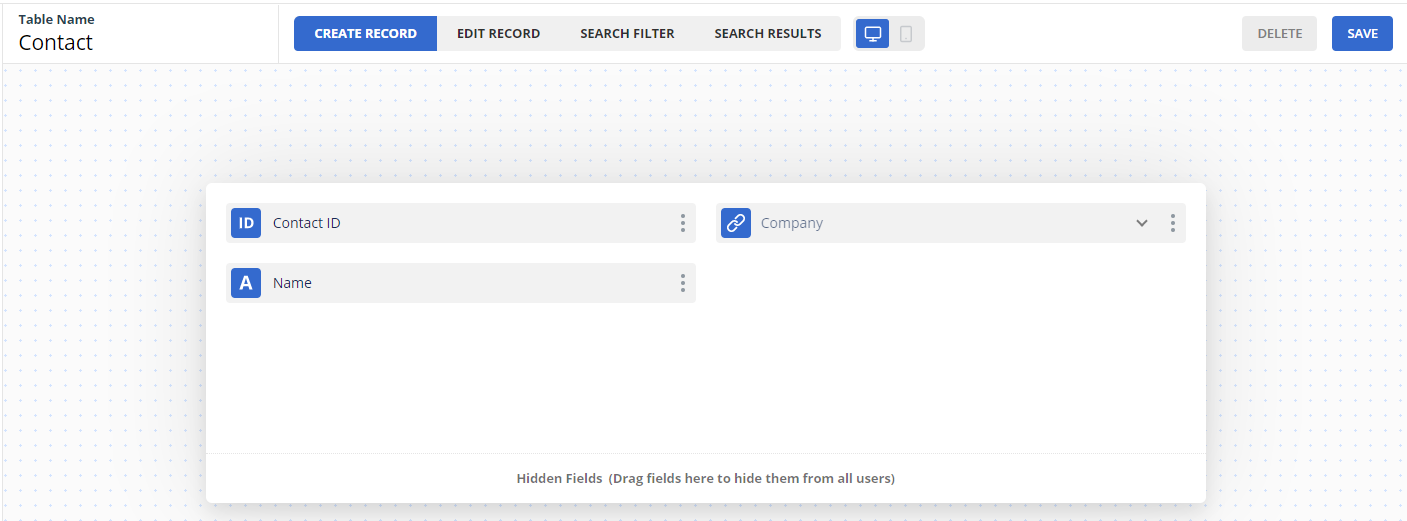
Once the tables are linked, when you now view the Contacts table the link to the parent Company will be shown as a field. When you view a Company, a table of the Contacts for that Company will show.
# Linking Tables using Screen Builder
You can create links between tables in the Screen Builder from either the parent table or the child table. Both methods are described below.
# Adding Link to Child Table
Open up edit mode for the project and select the Screens tab.
Select the parent table that you would like to add a child link to from the left hand navigation panel. In the example, this would be the Company table.
To add a child link for the selected table, click the Add Table to Company button underneath the table.

You can choose whether to link an existing table or to create a new one.
# Linking an Existing Table
In the example, if you have already created the Contacts table then select this from the list.

Click Close to close the modal.
The Contact table will now show as a related child table.
# Linking a New Table
If you have not already created the table that you would like to link, select the Create New Table option. Confirm that you are happy to save changes to your existing table.
This will take you to the page to create a new table, with the parent link already created.
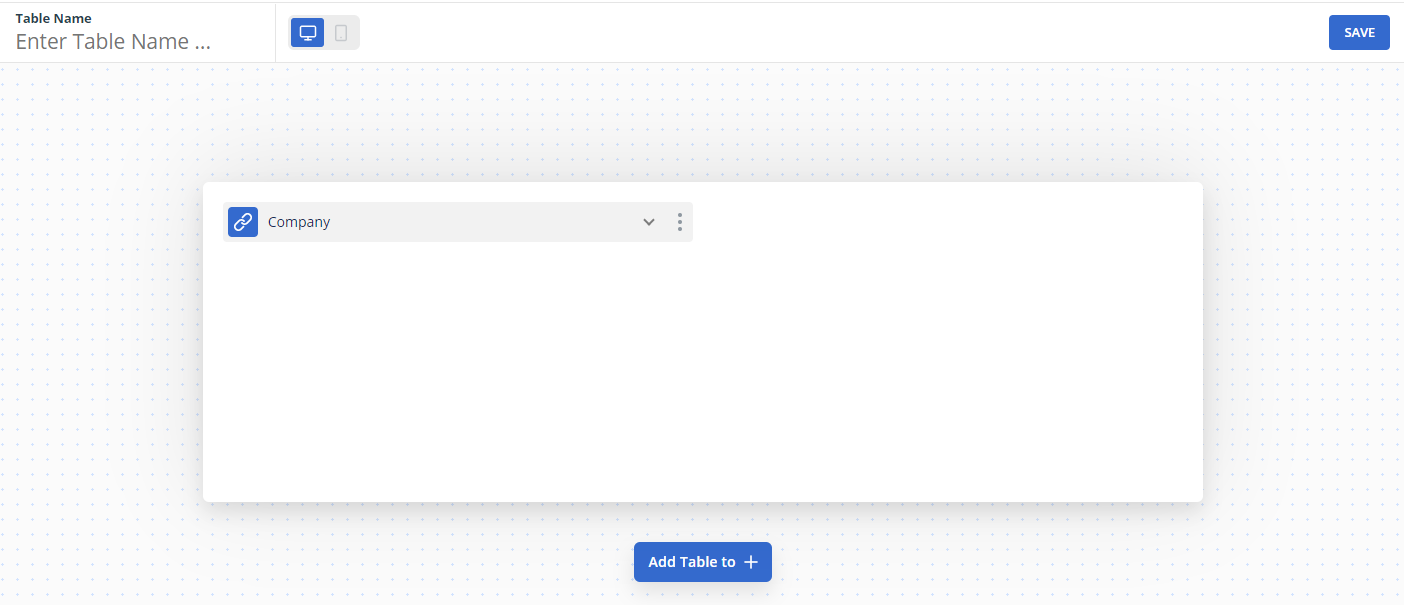
Give the new table a name and add any fields as needed. The new table can now be saved.
TIP
You can add multiple relationships to a table. Click the Add Table to button again to add another link.
# Adding Link to Parent Table
You can create the link between two tables from the intended child table instead of the parent table.
Open up edit mode for the project and select the Screens tab.
Select the child table that you would like to add a parent link to from the left hand navigation panel. In the example, this would be the Contact table.
Drag a Link to Parent field from the field bar to onto the Create or Edit screen.

You can choose whether to link an existing table or to create a new one.
# Linking an Existing Table
In the example, if you have already created the Company table then select this from the list.
You can add multiple parent tables for a table by repeating this process.
When you now view the Company table the link to the child Contacts will be shown underneath the screen.
# Linking a New Table
If you have not already created the table that you would like to link, when you configure the Link to Parent field select the Create New Table option. Confirm that you are happy to save changes to your existing table.
This will take you to the page to create a new table, with the child link already created.
Give the new table a name and add any fields as needed. The new table can now be saved.
# Linking Tables using Table Builder
To link two tables on the Table Builder screen, click the link icon on the parent table and then click the link icon on the child table.
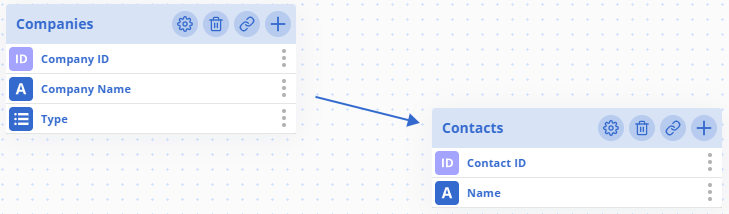
The link is created immediately.
TIP
The order you click the link icons is important, click the parent table first. For example, as each Company record will have many Contact records, click the Company table link icon first, then the Contact table link icon.
To check the relationship, click the connecting arrow between the tables to see further information about the link.

# Required Relationships
For some tables that you will create, it will not make sense to have child records existing without a parent record. For example, if you had a table for Order Lines you would want to ensure an Order Line always had a parent Order record.
This can be set in the relationship configuration for a relationship on either the Screen Builder or the Table Builder.
# Additional Table Settings
# Enabling Documents
If you account is on the team plan or above, you will be able to attach documents to your records.
You can choose whether each table should support the upload of documents. By default, all tables will allow documents.
To change whether a table allows document upload, in the Screen Builder choose the table you would like to change. Take a look at the settings in the bottom left hand corner.

Toggle the Documents Allowed checkbox as required.
To make this change using the Table Builder, open up the settings for a table and toggle the Documents Allowed checkbox as required.
